Download and installation
The OPC Bridge installation program can be downloaded from the The download page
Installation
Run the installation program with administrative rights. This can be done by right-clicking on the installation program and selecting the “Run as administrator” option. The installation can take a few minutes to complete. You will get the choice for selecting a path for program files and program data individually during the installation.
If you want to be able to remove the older version later, it is important to use a new path for the program files.
If you want to make a new clean install, and move the config manually later, also in order to ease a fallback situation, we recommend using a new path for program data.
After the installation, use a recent and up-to-date internet browser and browse to http://localhost:8088 or click on the newly created shortcut “opcBridge” on your desktop. This will start a wizard for connecting the OPC Bridge to the Hubgrade. Please follow the steps outlined below.
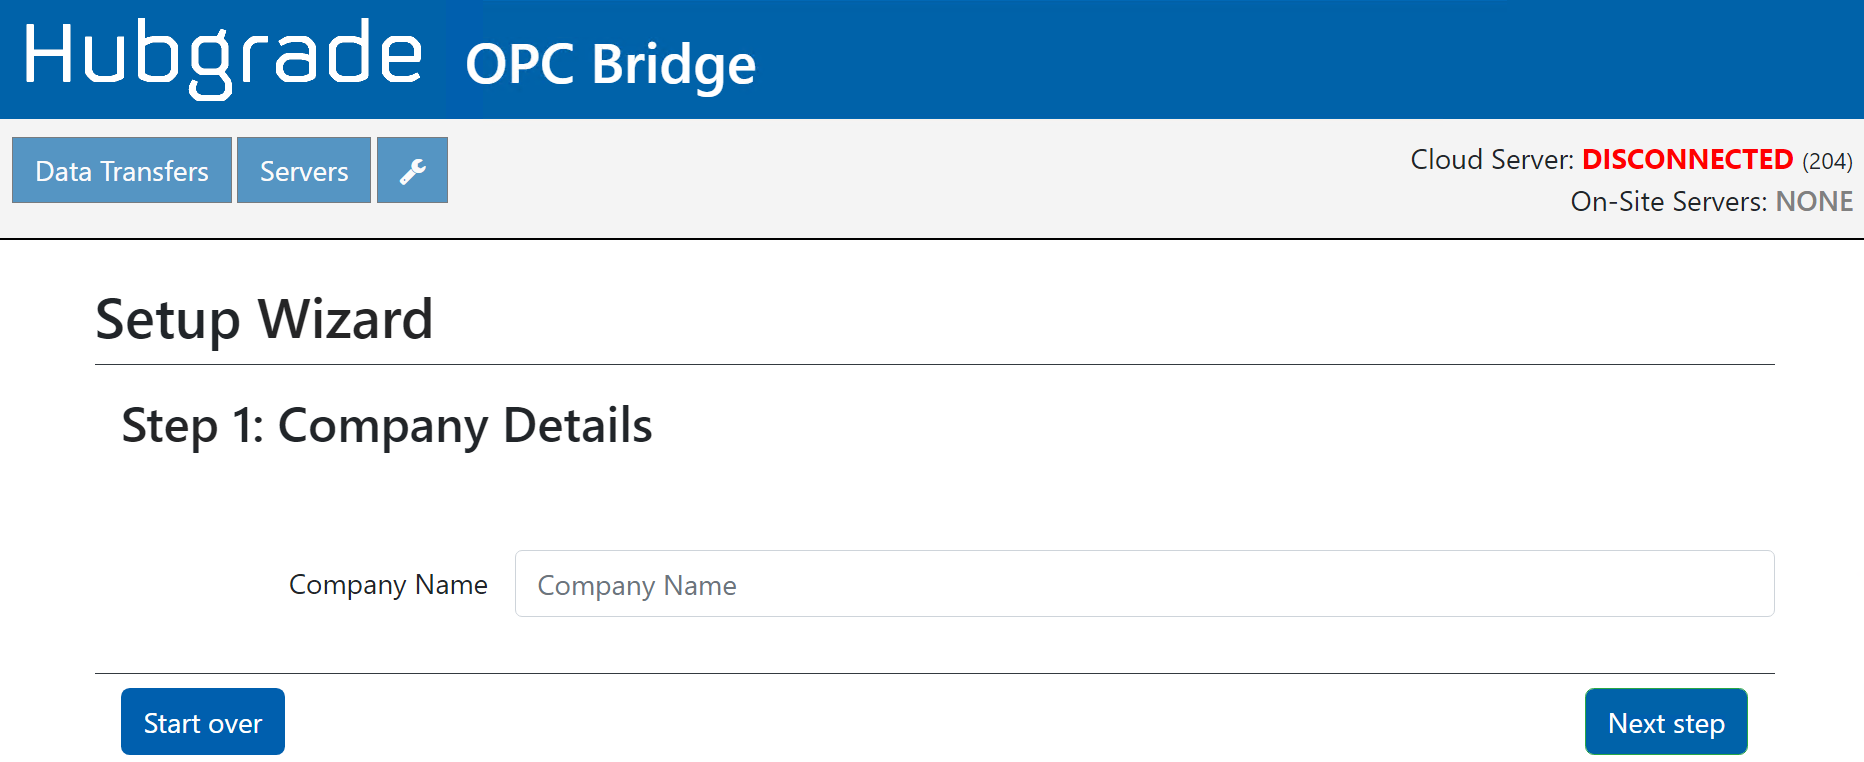
Step 1 - Company name
Step 2 - Connectivity
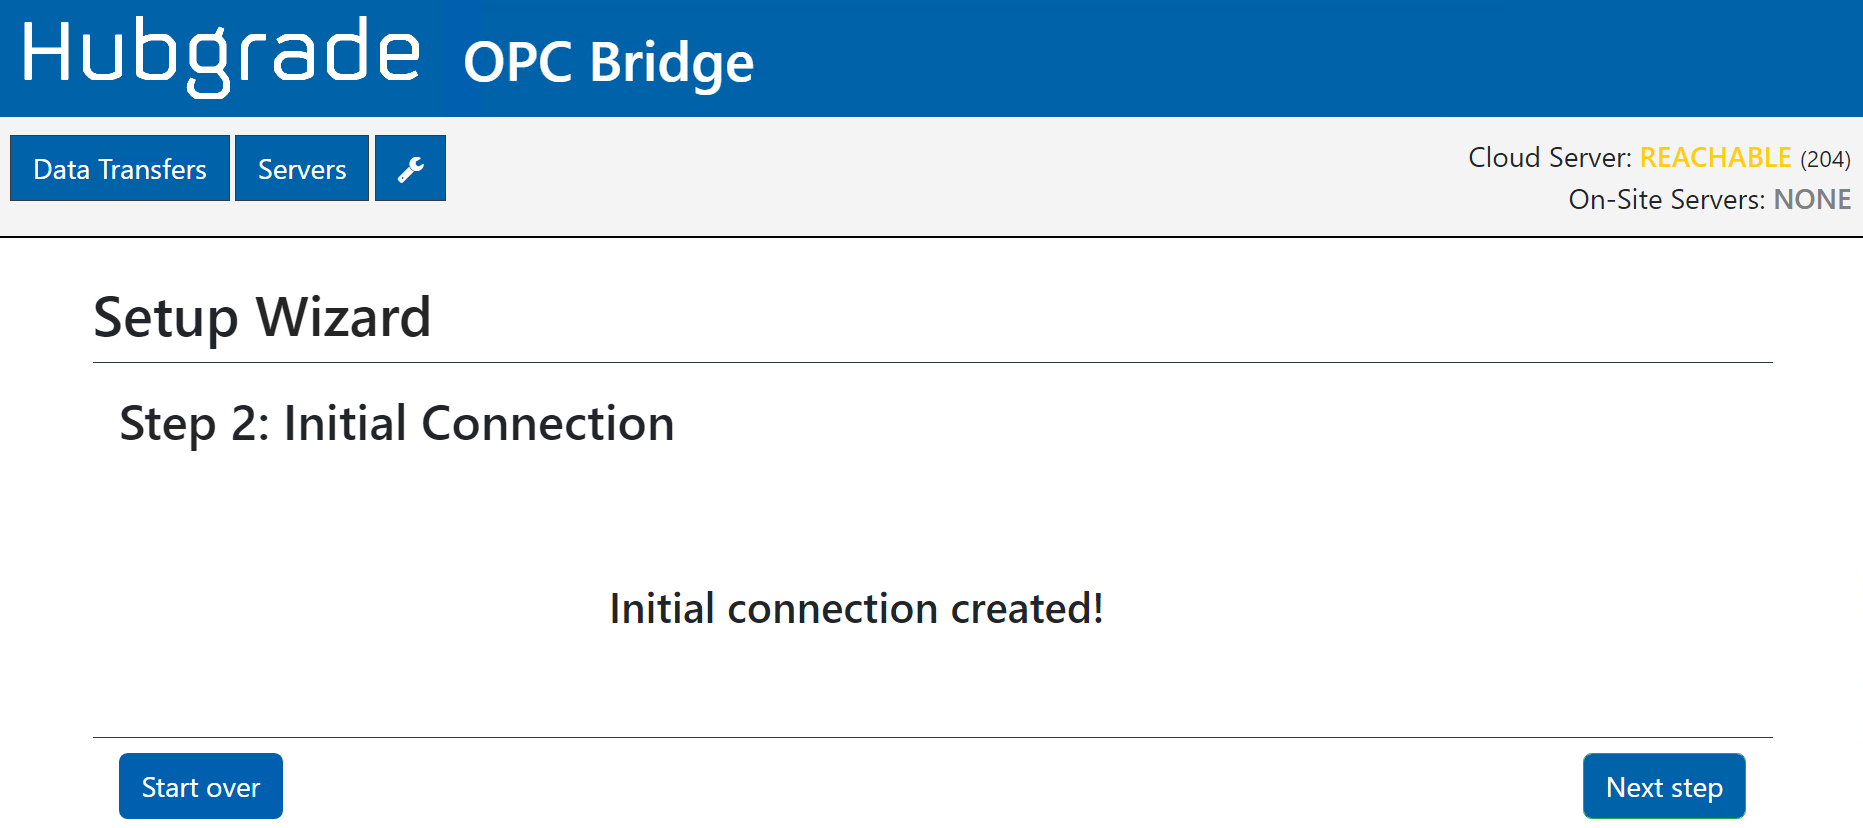
Check if the Server status in the upper right corner of the screen has the status “Reachable”in yellow).
If this is not the case, contact your IT department, to make sure the machine, OPC-Bridge is installed on, has access to communicate with the opc.cloud.kruger.dk and opc2.cloud.kruger.dk server on TCP port 52520.
The wizard verifies that it can connect to the OPC Bridge Windows service.
Click ‘Next step’
Step 3 - Connectivity and Exchange of certificates
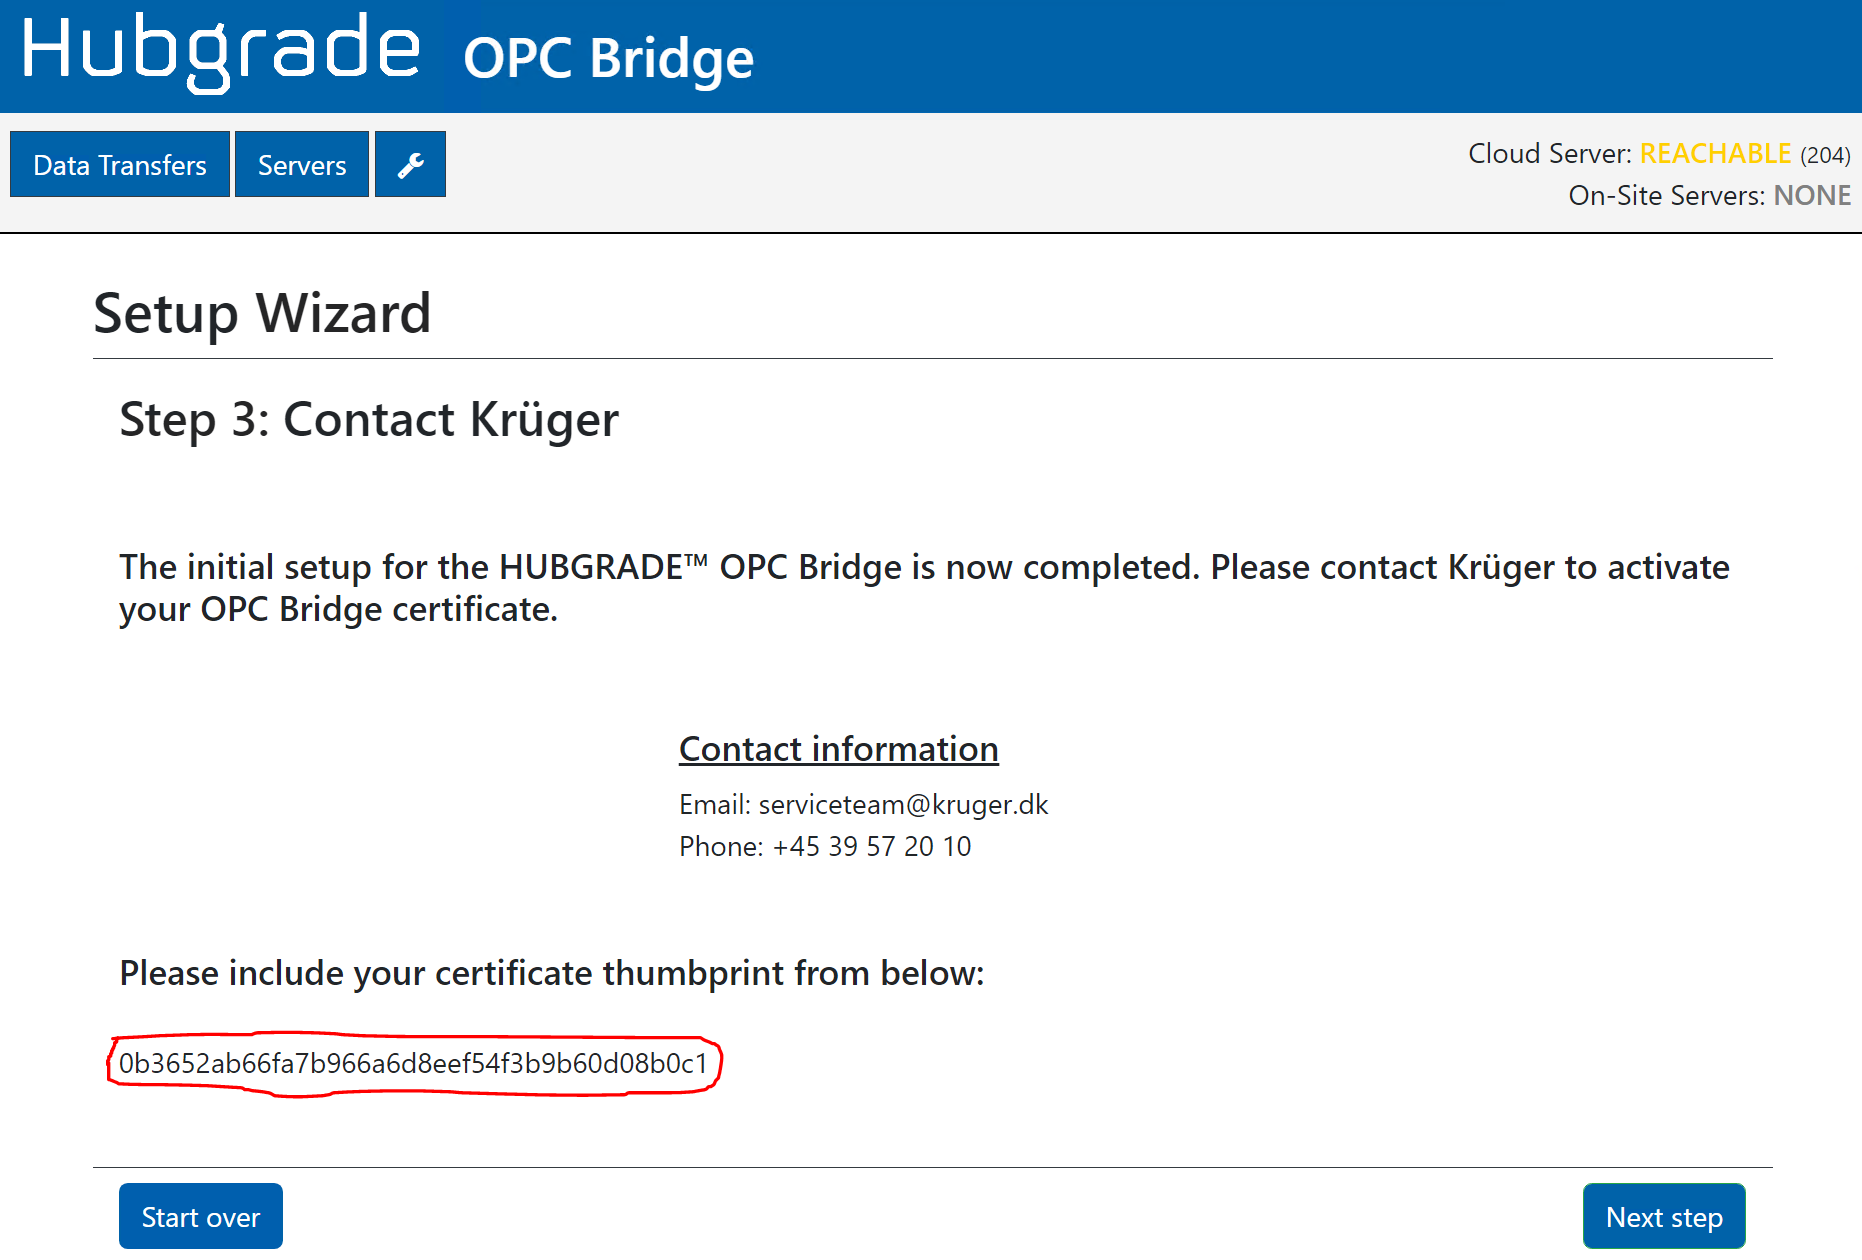
Copy the certificate thumbprint shown on the screen and mail it along with the company name that was specified on the previous screen to the email address listed on the screen.
When the Hubgrade service team receives the information, it will create a user account for the designated Hubgrade system administrator. The system administrator will receive an email with a link to a web page for finalizing the creation of the user account. This includes defining a password for the account.
The installation process can now be paused until the link has been received and the user account has been primed with a password.
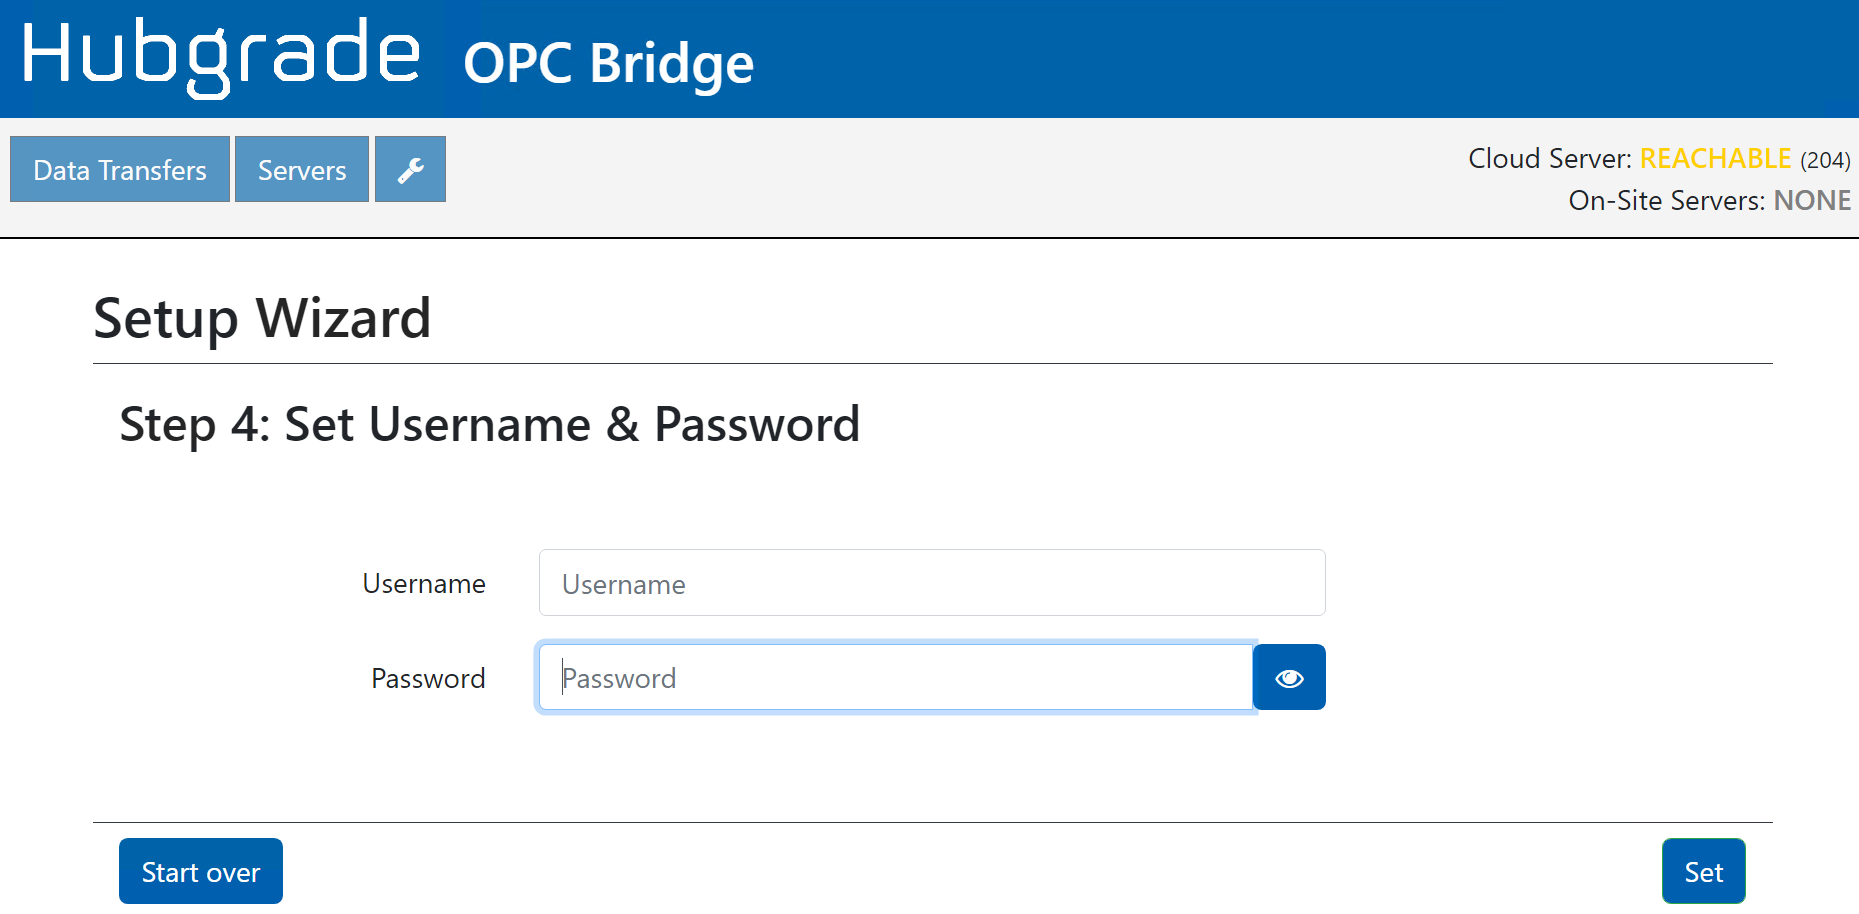
Setting up the connection to Hubgrade Wastewater Plant Performance
When the email from the Hubgrade service team has been received and when password has been set, the installation can commence with setting up the connection. Password requirements are at least 8 characters, lower and upper case characters and digits.
Browse again to http://localhost:8088 and enter the credentials for the newly created account - username provided by the Hubgrade service team and password set by yourself.
Within a minute you should see that the connection label for Hubgrade located at the upper right corner of the screen - turns green and says CONNECTED and you can click “Finalize”
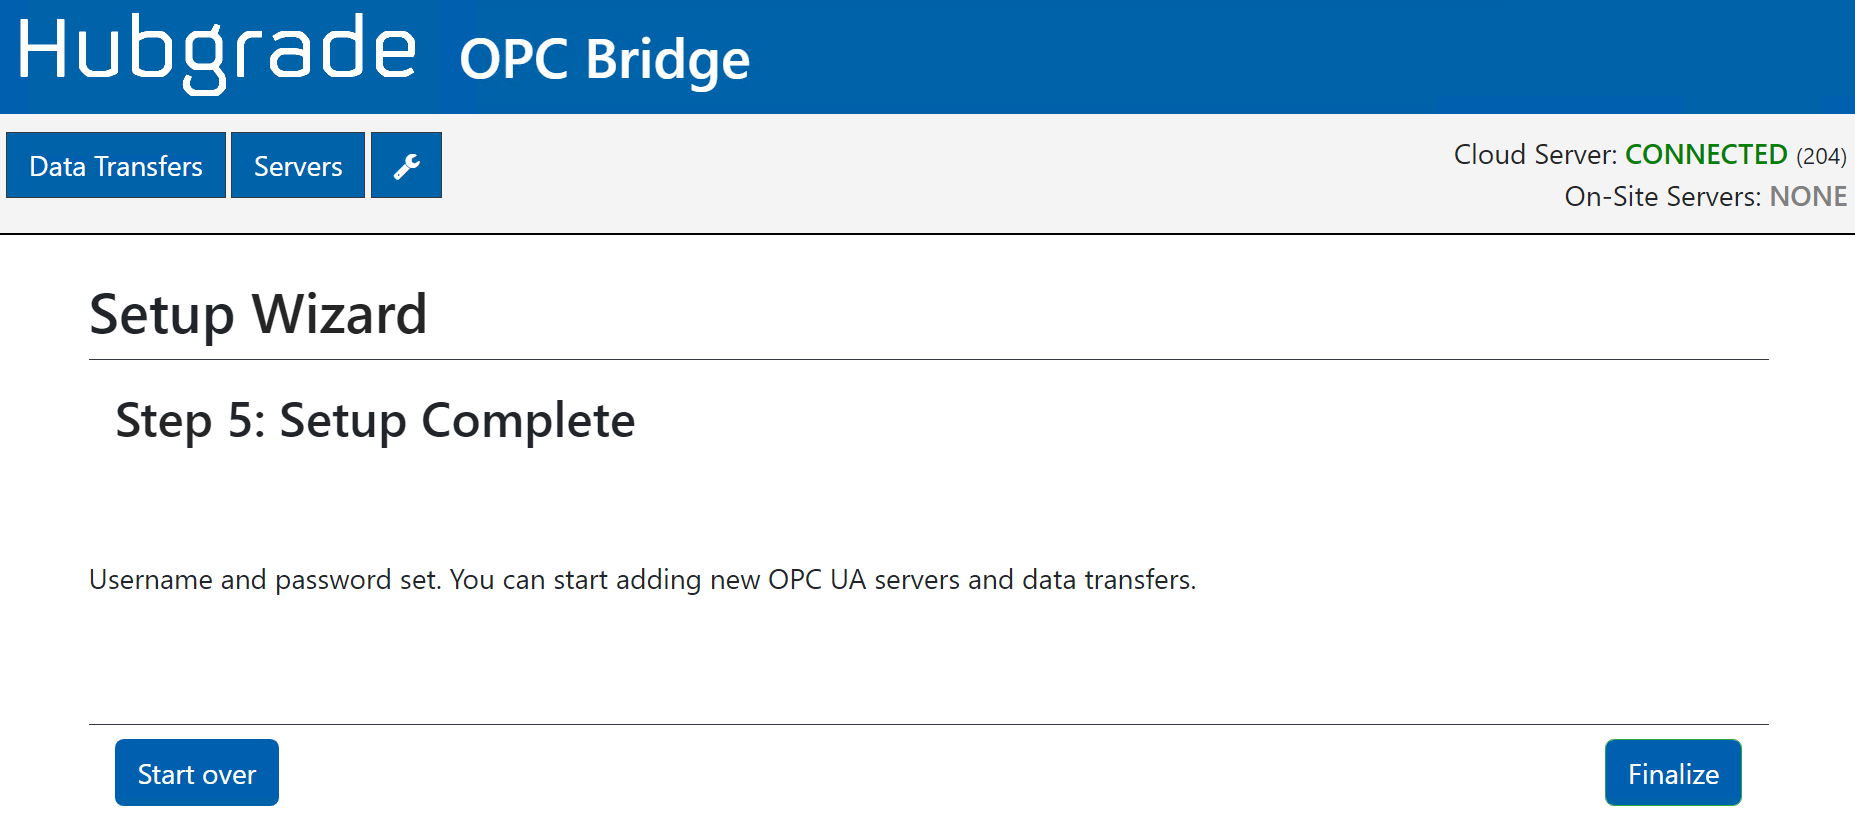
The OPC Bridge is now connected to the Hubgrade Cloud server. The next step is to connect the OPC Bridge to the local OPC server(s).
Setting-up the connection to local OPC servers
You connect the OPC Bridge to your local OPC server(s) by clicking on the “Servers” tap. This leads to a screen as the one shown in the figure below.
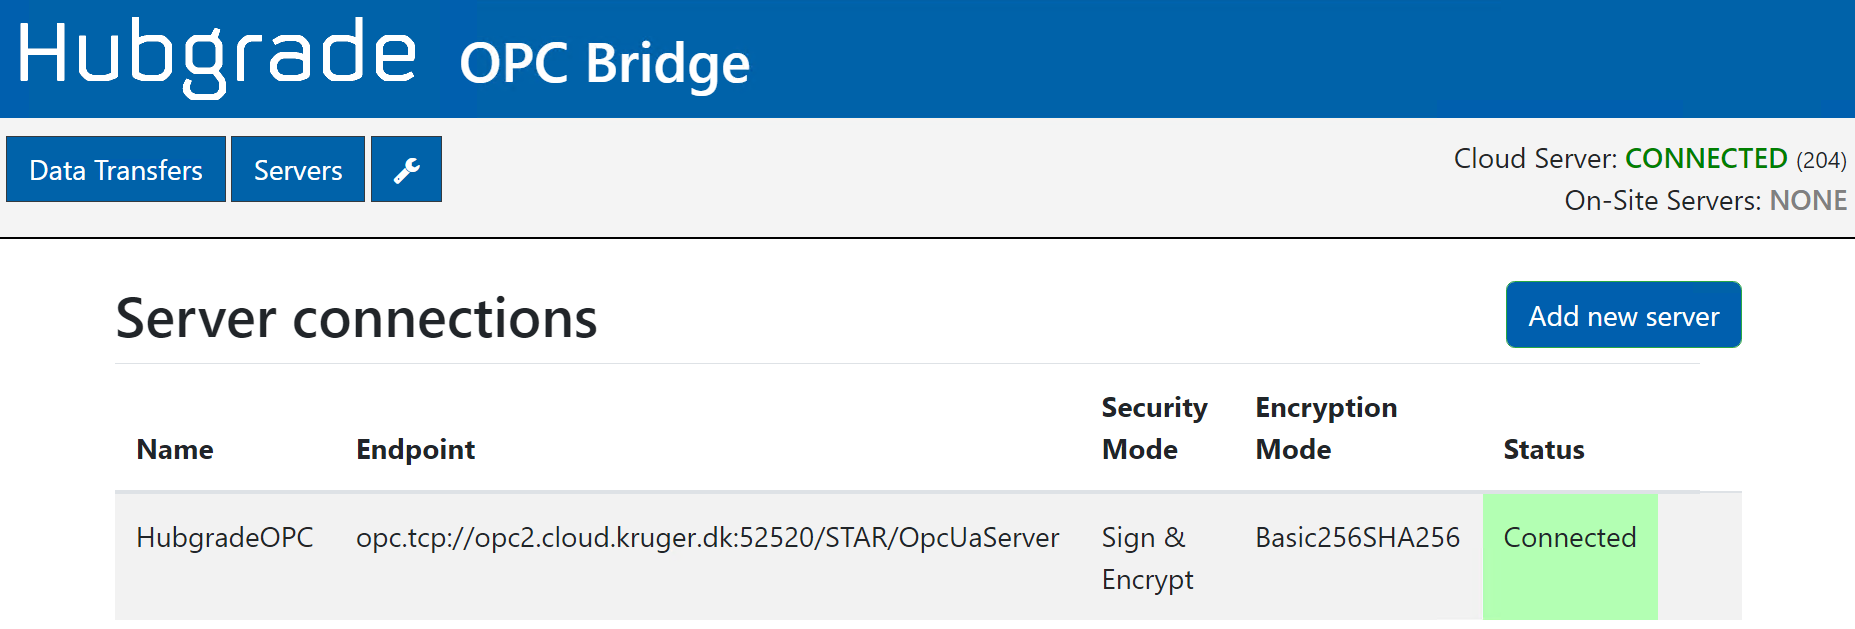
You should see that the connection to the Hubgrade Wastewater Plant Performance server is online - the label in the upper right corner should display CONNECTED. You add your own servers by clicking on the “Add new server” button. This leads to a screen as shown in the figure below.
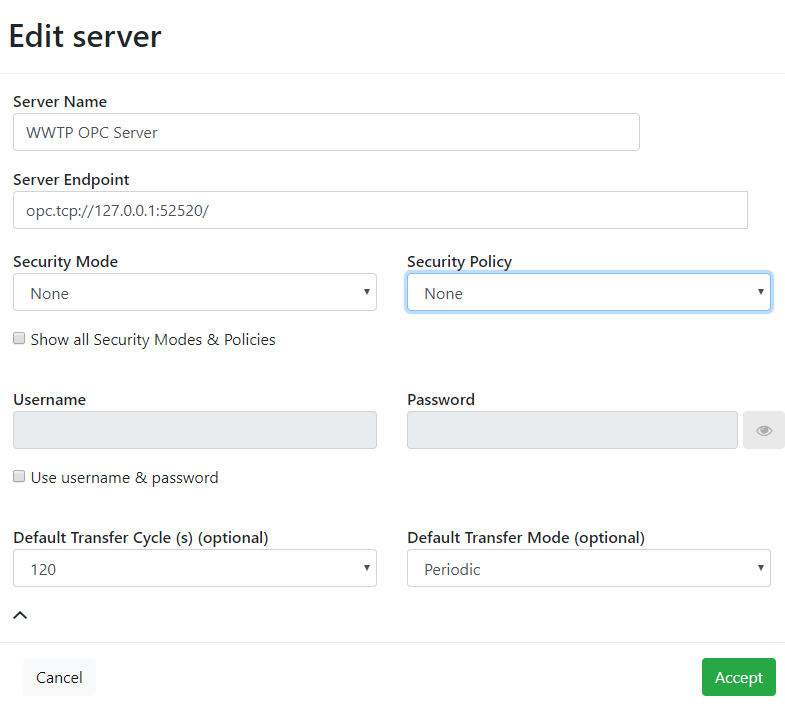
Identify the server by giving it a Server Name. You can select any name here, it is just used as an alias for the server endpoint string.
Enter the Server endpoint for the OPC server that you want to connect to. Please note: At the end of the field, a spinning wheel can be showed immediately after entering the server endpoint, this indicates that the OPC-Bridge is connecting the server to validate the endpoint as well as auto detecting what security mode and security policy is supported. If the OPC Bridge cannot connect to the server, it will display a warning.
Security Mode can be one of following:
None - Connection is not signed and no encryption of data is used.
Sign - Connection is signed but data is not encrypted.
Sign & Encrypt - Connection is both signed and encrypted.
Security Policy can be one of:
None - Connection does not use encryption.
Basic256 - Connection is encrypted.
Basic256Sha256 - Connection is encrypted, and data content verified with SHA256.
Many internal OPC servers run with security “None”. If this is the case with your OPC server, then simply select this from the Security Mode drop-down list and leave the username and password fields blank.
Select “Default Transfer Cycle”, default should be 120 seconds.
Select “Default Transfer Mode”, default should be “Periodic”, if you change this to “Subscribe”, your Hubgrade Wastewater Plant Performance Service might not work as intended.
Then click “Accept”.
The next step is configuring the OPC Bridge by pairing OPC tag names from the local OPC server with the corresponding OPC tag names in Hubgrade.